A deck that heaves in February is not a framing problem. It is a footing problem, and by the time anyone notices, the fix costs more than the original build.
In New Hampshire and anywhere else with a real winter, the rule is simple to say and easy to get wrong: the bottom of your footing has to sit below the frost line. Everything else about deck footings follows from that one requirement.
Here is what that actually means on a job site.
Why frost moves a deck at all
Water expands when it freezes. Soil holds water. When the ground freezes down to two or three feet, that soil swells and pushes up on anything sitting in it.
The force is not small. Frost heave can lift a loaded footing several inches. And it does not lift evenly. The corner of the deck in full sun and the corner shaded by the house freeze at different rates, so one side goes up and the other stays put. That is what racks the framing, opens gaps at the ledger, and leaves you with a deck that pitches toward the house instead of away from it.
Then spring comes, the ground thaws, and things settle back down. Not all the way, and not evenly. Do that for five or six winters and the deck is visibly out of level.
Get the bottom of the footing below the layer that freezes and none of that happens. The soil above the footing can do whatever it wants as long as the bearing surface stays in ground that never freezes.
Find your actual frost depth
This is the part people guess at, and guessing is how you end up ripping out footings after an inspection.
Frost depth is set by your local building department, not by a chart on the internet. In southern New Hampshire the required depth is commonly 48 inches. Go north and it gets deeper. Cross into a different town and the number can change even when the weather does not, because towns adopt code amendments independently.
Call the building department in the town where the deck is going and ask two things. What is the required frost depth, and do they have any local amendments for decks specifically. It takes five minutes and it is the single cheapest piece of insurance on the whole project.
Do not carry a number from one town to the next because the jobs looked the same. That is the mistake that gets caught at inspection.
Depth is measured to the bottom, not the top
Worth stating plainly because it trips people up. If your required frost depth is 48 inches, the bottom of the footing needs to be at 48 inches or lower. Not the top of the pier. Not where the tube starts.
So a 48 inch requirement means a hole closer to 50 or 52 inches once you account for the footing thickness itself, plus whatever you need above grade.
Sizing the footing across
Depth keeps the deck from heaving. Diameter keeps it from sinking. They are two different problems and you have to solve both.
The footing has to spread the load over enough soil that the ground can carry it. How much area you need depends on how much weight lands on that post and what the soil can bear. A footing under a post carrying a corner of a small deck is doing far less work than one under a post in the middle of a long beam span with a hot tub over it.
Twelve inch diameter is the common default for ordinary residential decks on decent soil, and prescriptive deck tables will get you to a size based on your beam and joist spans. But if the soil is soft, if there is fill, or if the deck is carrying anything unusual, the table is not the answer and you should be getting it engineered.
Rule of thumb worth keeping: when in doubt, go wider. Concrete is cheap compared to the phone call two years later.
What actually goes in the hole
A few approaches, all of them fine when done right.
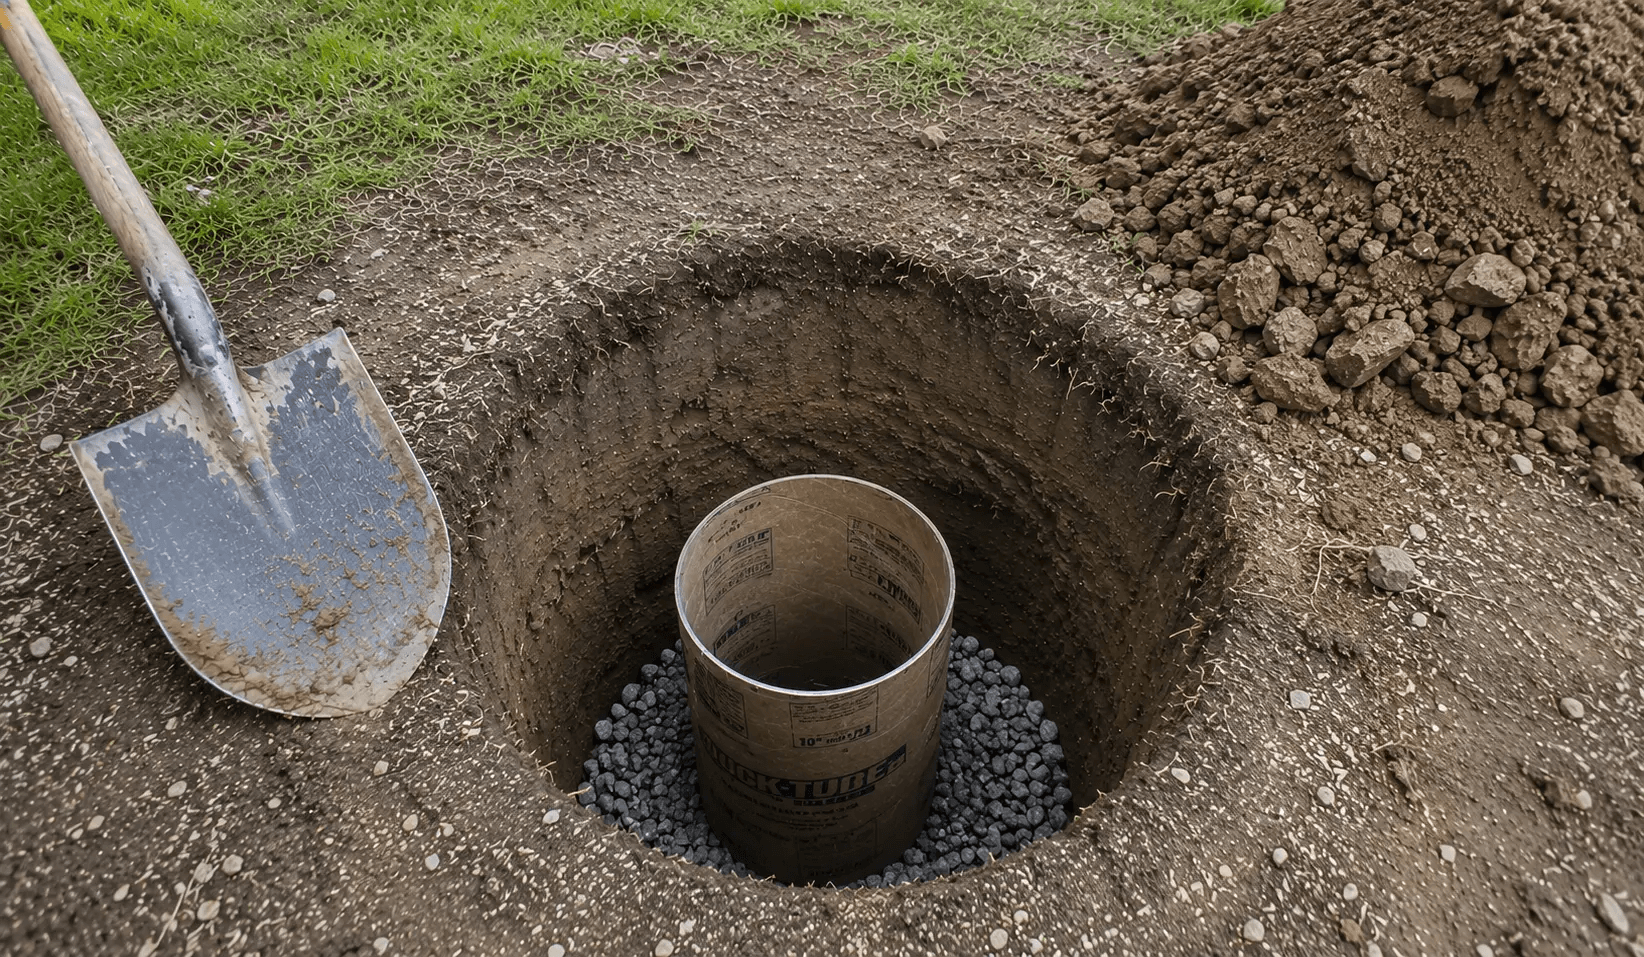
Poured concrete with a cardboard form tube. The most common by far. Dig, set the tube, pour, set the anchor. Straightforward and inexpensive. The catch is that a plain straight tube gives you very little resistance if frost grabs the sides of the pier, which is a real issue in soils that hold water.
Poured footing with a bell or a spread base. Same idea but with a wider pad at the bottom, either formed or using a plastic footing form that snaps onto the tube. This gives you a bigger bearing surface without digging a wider hole the whole way down, and the flare at the bottom resists uplift if the ground tries to pull the pier up.
Helical piles. Screwed into the ground with a machine, down past the frost line to load bearing soil. Fast, no spoils to haul away, no cure time, and you can install them in weather that would shut down a concrete pour. They cost more per point and you need someone with the equipment. On tight sites, poor soil, or a job you need to frame next week, they can be the cheaper option once you count everything.
Precast pier blocks sitting on grade. Fine for a floating ground level platform that is not attached to the house and does not need a permit. Not fine for an elevated deck with a ledger. If it is bolted to the building, it needs real footings.
The mistakes that show up years later
Backfilling with the wrong material. If you pack the hole around the pier with the clay you just dug out, you have surrounded your footing with soil that holds water and grips concrete when it freezes. Clean gravel drains and lets the pier move independently of the frost.
Leaving the form tube on above grade. Cardboard holds moisture against the concrete. Cut it off at grade.
Digging in fill and calling it done. Below frost line only helps if you are bearing on soil that can carry the load. If you punch through four feet of old fill, you are below the frost line and still sitting on nothing. You want undisturbed native soil. If you cannot find it at a reasonable depth, that is an engineering conversation, not a shovel conversation.
Water sitting in the hole when you pour. Pump it or bail it. Pouring into standing water weakens the concrete right where you need it strongest.
Setting the anchor after the concrete sets up. Post bases need to go in wet and get positioned before it cures. Drilling and epoxying later is a repair, not a method.
Frost grabbing a smooth pier and lifting the whole thing. This is called adfreezing and it is the one people forget about. Even with the bottom below frost depth, if the soil bonds to four feet of pier surface it can drag the footing upward. A flared bottom fights it. So does a smooth exterior on the pier and gravel backfill instead of native clay.
Permits and inspection
Most attached decks need a permit, and in most towns the footing holes get inspected before you pour. That means digging, then stopping, then waiting.
Build that into the schedule and tell the customer about it up front. A homeowner who was told to expect a two day gap is fine with it. A homeowner who watches your crew disappear for two days with holes in the yard and no explanation starts wondering what they hired.
Same logic applies to how you write the job up in the first place. If there is any chance you hit ledge or fill and the footings get more complicated, that belongs in the exclusions section of your quote with a price attached, not in a conversation in the driveway. We covered how to structure that in writing a quote that wins the job.
The short version
- Call the local building department for the required frost depth, every town, every time
- Measure to the bottom of the footing, not the top of the pier
- Size the diameter for the load, not out of habit
- Bear on undisturbed soil, not fill
- Backfill with clean gravel
- Flare the bottom or use a spread base to fight uplift
- Set anchors while the concrete is wet
- Schedule around the footing inspection and tell the customer it is coming
Deck footings are one of the few parts of a build where doing it right costs almost nothing extra and doing it wrong costs everything. An extra foot of depth and a wider base is maybe twenty dollars of concrete per point. A deck that has to be jacked and re-footed in year four is a weekend of free labor and a customer who tells everyone.
If you build fence as well as deck, the same frost rules drive how deep fence posts need to go in cold climates, though the failure modes look a little different.
And when the deck comes out right, photograph it. Footings are invisible in the finished product, but the level line across a five year old deck is the thing that gets you referred. Here is how to shoot job site photos that actually help your business.